When my sister started planning her fall wedding, I knew we would HAVE to throw her a festive fall decor bridal shower! I went to pinning all the cute ideas. We wanted to do a brunch bridal shower and you NEED donuts for brunch. Apple cider donuts for our fall themed shower were a must!
I started looking for creative ways to display the donuts (I knew I didn’t want to just put them on a plate- boring). And I couldn’t find anything I loved without spending a pretty penny. So, I decided to make my own!
I have seen the cute boards where you hang the donut on a long stick and liked that idea but wanted to make it my own. So off to Hobby Lobby I went and searched for supplies. I love what I came up with! Super easy, budget friendly, cute and reusable! Here is my how-to DIY candlestick donut stands.
DISCLAIMER: This post contains affiliate links. Which means I might be compensated for purchases made from these links at no additional cost to you. I am not responsible for any actions taken from my advice, all ideas and opinions on this post remain my own.
Supplies List
- Unfinished wooden candlesticks
- Unfinished wooden spool pieces
- Unfinished wooden round pieces with hole in the middle (of different sizes if you want!)
- Unfinished wooden rods (to fit in holes)
- Glue gun and glue sticks
- Wood glue
- Acrylic paint
- Paintbrushes
And that’s all you need! The whole project cost me under $30 (I already had the glue gun and glue sticks). I got all of my wood supplies from Hobby Lobby. You don’t need this exact set-up just some unique wooden pieces will work just fine!
Just make sure you have a larger flat surface on top for the rod and donuts to set on.

Steps
Step 1: Assemble your bases
I wanted all my candlesticks to be different sizes. I like things to complement each other but not be matchy-matchy. So before I started to glue anything, I laid everything out to see what I wanted each to look like.
I ended up using 3 candlesticks and adding spool pieces or just the round, flat wooden pieces to make them different heights. For the smallest, I just had 2 of the spool pieces on top of each other.
Every candlestick needed the round, flat piece on top to ensure the wooden rod could be assembled on each candlestick.

Step 2: Hot glue pieces together
Make sure everything is glued together and sitting straight on the other pieces. You don’t want a leaning tower! Also, I waited until the end after I painted to add the wooden rods. I wanted them to stay the natural wood color. You can glue them on now or later it doesn’t matter!
TIP: I had once place on the tallest candlestick that there was a gap between two wooden pieces. I tied a piece of twine around the gap to hide it and also make it a little more unique!
Step 3: Paint
Since we did a fall themed brunch for this shower- I chose fall colors to paint the candlesticks. I love these rustic, rich colors they went perfectly with our theme!

I did have to do 2 coats to hide all the brushstrokes.

Step 4: Glue in wooden rods
I used wood glue to put down in the hole on the very top. Then placed the rods in and hot glued around them. Just make sure they are standing straight up! Again, you don’t want it to lean.
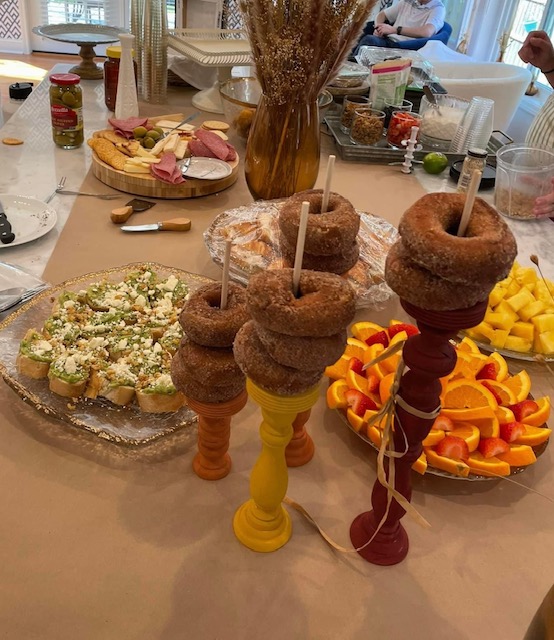
And here is the finished product! This was such a quick and EASY craft to make. It was also perfect for adding height to the brunch display and a hit with all the guests!

Make sure you follow me on pinterest at The Mallard Mama to check out some of my other party planning crafts and ideas!